
This article may contain links to recommended products. If you purchase through these links, I may receive a small commission at no extra cost to you. I only recommend products I genuinely use and trust.
I still remember the first time I tried to make my own fermented food at home—I was nervous and honestly a little skeptical. Could something as simple as cabbage and salt really become a “superfood” in my kitchen? But after a couple of batches, I was hooked. Not only did my digestion improve, but I also noticed more energy, a brighter mood, and even my kids were curious (and surprisingly adventurous) about trying the new flavors.
As a counselor—and as a mom who’s faced her own mental health struggles—I became a real fan of fermented foods because I saw firsthand how much gut health and mood are connected. I was searching for natural, gentle ways to support my own wellbeing while juggling family life, and the research around probiotics and the gut-brain connection gave me hope. What started as a small experiment in the kitchen turned into a daily ritual that helped me and my family feel more balanced, resilient, and connected.
Fermented foods have become a regular part of our family’s routine. We love experimenting with classic sauerkraut, tangy fermented cabbage juice, creamy kefir, homemade kombucha, and probiotic-rich L. reuteri yogurt. In this beginner’s guide, I’m sharing how to start, our favorite easy recipes, and real tips to make it work for any family—even if you’ve never fermented anything before!
Curious about the specific benefits of L. reuteri yogurt and how it changed my own gut and mental health?
Read my full story here: How L. Reuteri Yogurt Changed My Post-COVID Gut and My Motherhood
Why Try Fermenting at Home?
Fermentation is the ancient process of using natural bacteria to transform ordinary foods into nutrient powerhouses. It’s science, but it’s also simple: with just salt, water, and a little patience, you can make your own gut-friendly foods at home.
Why it’s worth trying:
- Gut health: Fermented foods are rich in probiotics that help balance your gut microbiome, aid digestion, and even support immunity.
- Mood boost: There’s growing evidence that gut health is connected to mood and brain function—a bonus for moms and busy families.
- Budget-friendly: Making your own ferments costs just pennies per serving compared to store-bought options.
For us, it all started with a jar of cabbage and salt. That first batch made me realize just how much better I could feel with a little help from good bacteria!
If you’re like me, you want to know the “why” behind every new kitchen experiment—especially when it comes to your health and your family’s wellbeing. When I first started fermenting, I binged every podcast, audiobook, and interview I could find about gut health, probiotics, and real-life mental health transformations.
Honestly, it was hearing experts break down the science in a relatable way—and sharing stories that sounded just like mine—that gave me the confidence to try making my own fermented foods. Whether you listen on your morning walk, while cleaning, or just for inspiration in the kitchen, these episodes are worth your time!
My top recommendations for anyone curious about home fermentation, gut health, and the mind-body connection:
1. Huberman Lab – “How to Enhance Your Gut Microbiome for Brain & Overall Health”
Also, if you have any concerns related to mental health or your mood, YOU NEED to read Dr. Natasha Campbell-McBride books. Take a look here, or just listen any newer podcast with her on youtube.
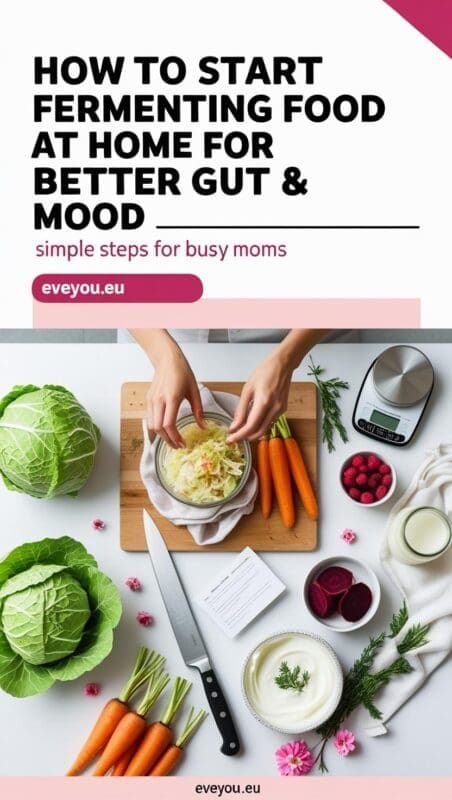
Essential Tools & Ingredients for Beginners
Getting started is easier than you think. You don’t need fancy gadgets—just a few basics:
Tools:
- Glass jars (Mason jars are perfect)
- Lids (metal or plastic, not airtight)
- A small weight or clean stone (optional, to keep veggies submerged)
- Mixing bowl and wooden spoon
- Kitchen scale or measuring spoons
Starter ingredients:
- Fresh veggies (like cabbage, carrots, or garlic)
- Salt (non-iodized, like sea salt or pickling salt)
- Water (filtered if possible)
- Starter cultures (optional, for yogurt or kefir)
- Optional: prebiotic fiber (like inulin) for creamy yogurt
Tip:
You can reuse old jars and improvise with kitchen items you already have—don’t let perfection stop you from starting!
Starter Fermentation Kit for Beginners
If you’re just starting with fermentation, a complete fermentation kit can make the process much easier. This set includes glass jars with airlock lids and fermentation weights, which help keep vegetables submerged and prevent spoilage. Having everything in one kit removes the guesswork and ensures your sauerkraut, kimchi, or pickles ferment safely and consistently.

- PREMIUM STARTER KIT FOR THE HOME FERMENTER: Includes all the tools needed to convert a regular (small) mouth mason jar i…
- 9 PC KIT INCLUDES: 4 Pickle Pipe Airlock Tops, 4 Pickle Pebble Infinity Glass Weights, 1 Acacia Pickle Packer Vegetable …
- MAKE YOUR OWN DELICIOUS PROBIOTIC SUPERFOODS: Ferment vegetables (carrots, pickles & radishes etc.) in a brine or use yo…

Easy Fermented Recipes Anyone Can Make
A. Classic Sauerkraut
Why it’s great:
Sauerkraut is the easiest way to learn fermentation. It’s crunchy, tangy, and packed with probiotics.
Ingredients:
- 1 medium green cabbage
- 1.5 tablespoons sea salt
Instructions:
- Slice cabbage thinly and place in a large bowl.
- Sprinkle with salt and massage for 5–10 minutes, until the cabbage releases liquid.
- Pack tightly into a glass jar, pressing down so the brine covers the cabbage.
- Place a small weight or cabbage leaf on top to keep the veggies submerged.
- Cover loosely with a lid or cloth.
- Let ferment at room temperature (out of direct sunlight) for 5–10 days. Taste after 5 days—when it’s tangy to your liking, store in the fridge.
B. Fermented Cabbage Juice (Family Favorite!)
My family loves this mineral-rich, tangy juice. It’s perfect as a small “shot” before meals to support stomach acid and digestion.
Ingredients:
- 1 head of cabbage, chopped
- 1–2 teaspoons sea salt
- 4 cups filtered water
Instructions:
- Blend cabbage with water and salt until it’s a thick, pulpy liquid.
- Pour into a large glass jar, cover with a clean cloth or loose lid.
- Leave at room temperature for 2–4 days, tasting daily.
- Once it’s tangy, strain out the pulp and store the juice in the fridge.
- Drink a small glass before meals, and use the leftover pulp in soups or compost.
C. Simple Lacto-Fermented Carrots
These are kid-friendly and easy to customize.
Ingredients:
- 3 large carrots, peeled and cut into sticks
- 1 tablespoon sea salt
- 2 cups water
Instructions:
- Dissolve salt in water to make a brine.
- Pack carrots into a jar and cover with brine.
- Weigh down the carrots so they stay submerged.
- Cover and ferment at room temperature for 3–5 days, then refrigerate.
D. Homemade Yogurt or Kefir
You can use milk or coconut milk, plus a starter culture or probiotic capsule.
Ingredients:
- 1 quart milk (dairy or coconut)
- Starter: yogurt culture, L. reuteri capsule, or kefir grains
Instructions:
- Heat milk to 180°F (82°C), then cool to 110°F (43°C).
- Stir in your starter or culture.
- Pour into a jar, cover, and incubate at 100–110°F (use a yogurt maker or oven light) for 12–36 hours.
- Chill and enjoy! (See my detailed yogurt instructions here)
E. Beginner’s Kombucha
If you love fizzy drinks, kombucha is an exciting project!
Ingredients:
- 1 SCOBY (symbiotic culture of bacteria and yeast)
- 8 cups black or green tea
- 1 cup sugar
Instructions:
- Brew tea, dissolve sugar, and cool to room temperature.
- Pour into a large jar and add the SCOBY.
- Cover with a cloth and ferment for 7–10 days.
- Taste daily; when slightly tart and fizzy, pour into bottles and refrigerate.
How We Enjoy Fermented Foods—And Tips for Starting Slow
One of our family favorites is fermented cabbage juice. I simply blend fresh cabbage, add water and salt, and let it ferment. When it’s ready, I strain out the cabbage pulp, leaving behind a tangy, mineral-rich juice. We love sipping a small glass or teaspoon before meals—it’s not just refreshing, but it’s also a gentle way to support healthy stomach acid and digestion. It might sound unusual, but it’s a tradition we all look forward to now!
We’re always experimenting—trying homemade fermented garlic, bubbly kombucha, L. reuteri yogurt, and classic kefir. But if you’re new to fermented foods, my biggest advice is this: start slow. Even a spoonful a day can do wonders, and your gut (and tastebuds) need time to adjust.
Tips for Adding Fermented Foods to Your Family’s Diet
- Sneak it in: My kids barely notice when I blend a bit of kefir or L. reuteri yogurt into homemade salad dressings or swirl it into berry smoothies. Start with tiny amounts and increase gradually.
- Start with what you know: Use familiar flavors—like mixing a little sauerkraut juice into soup or adding a teaspoon of fermented veggies to taco night.
- Make it a habit: Serve a small shot of cabbage juice before dinner or a dollop of yogurt with fruit for breakfast. Consistency matters more than quantity.
- Keep it fun: Get the kids involved! Let them help with mixing, tasting, or decorating jars. When they take part, they’re more likely to taste the results.
- Listen to your body: Every gut is unique. If anyone in your family feels gassy or bloated, ease up and try again a few days later. Slow and steady is key.
- Combine with favorite foods: Use kefir or yogurt as a base for dips, salad dressings, or pancakes. Swirl a spoonful of kombucha into juice for a fizzy twist.
Remember: You don’t need to overhaul your meals overnight. A little goes a long way, and before you know it, these healthy ferments will become a normal (and delicious!) part of your family’s routine.

Common Mistakes & Troubleshooting
Every beginner (myself included!) runs into a few bumps. Here are common mistakes and how to fix them:
- Mold or funny smells: If you see fuzzy mold (blue, pink, black) or it smells rotten, toss it and start over. Clean jars and the right salt-to-water ratio are key!
- Veggies not submerged: Always keep ferments under the brine. Use a clean weight or extra leaf.
- Too sour, too salty, or too soft? Taste daily and move to the fridge when it’s just right. If too salty, try a lighter brine next time.
- Gassy or bloated? Eat smaller amounts and let your gut adjust.
My funniest flop:
Once, I forgot to loosen the jar lid, and my first kombucha batch exploded—sticky tea everywhere! Lesson learned: pressure builds up, so use loose lids or cloth covers.
How to Enjoy Fermented Foods Every Day
- Add a spoonful of sauerkraut to scrambled eggs or avocado toast.
- Drink a shot of cabbage juice before meals.
- Stir kefir or yogurt into fruit smoothies or overnight oats.
- Snack on fermented carrot sticks or garlic cloves.
- Use kimchi or kraut on sandwiches, salads, or wraps.
- Pour kombucha as a mocktail with ice and fruit.
FAQ: Your Fermentation Questions Answered
Is it safe to ferment at home?
Yes, with clean jars and following recipes, home ferments are safe. If you see mold, discard and start fresh.
Can I use less salt?
Salt is important for safe fermentation. You can reduce it a little, but too little increases risk of spoilage.
How long do ferments last?
Most keep for months in the fridge! Always use a clean spoon and check for off smells.
Do homemade ferments have probiotics?
Yes! Especially if made with live cultures and not pasteurized.
Can I make it work in a tiny kitchen?
Absolutely. All you need is a countertop and a little space in your fridge.
Why Fermenting at Home is Easier (and More Fun) Than You Think
Fermenting foods at home honestly started as a simple curiosity—just me in my kitchen, hoping to help my gut and feel a little better as a mom. I never expected it would become such a grounding, nourishing routine for our whole family. Now, whether it’s a tangy shot of cabbage juice before dinner, creamy kefir blended into our morning smoothies, or homemade yogurt with fresh berries, these small, everyday rituals have truly changed how we feel—body and mind.
What’s surprised me most is how much these foods have supported not just our digestion, but also our moods, our energy, and even our connection as a family. The kitchen messes, the experiments that flopped, and the recipes we now make on repeat—they’re all part of the story.
If you’re even a little curious, I hope you’ll give fermenting a try. You don’t need to get everything perfect—just start with one jar, see what happens, and enjoy the process. And if you have stories, questions, or favorite recipes, I’d absolutely love to hear them in the comments below!
Curious about the gut-brain connection or looking for specific probiotic recipes? Explore these next:
Affiliate disclosure:
This article may contain links to recommended products. If you purchase through these links, I may receive a small commission at no extra cost to you. I only recommend products I genuinely use and trust.
Ready to start your fermentation journey? Pin this article for later and tag me in your kitchen creations!

About the Author
Hi, I’m Eve, a former school counselor with a master’s degree in School Psychology and a passionate advocate for children and families navigating sensory challenges. As a mom of children with sensory sensitivities, I deeply understand the journey special-needs parents face, and I dedicate myself to researching and sharing practical solutions to help children thrive and feel comfortable in their bodies. My goal is also to empower counselors, therapists, and psychologists with creative strategies and supportive resources to enrich their everyday practice. When I’m not writing or exploring new therapeutic approaches, you’ll find me spending quality time with my family and continually seeking inspiration from everyday moments.