
Plant wall art can bring color, texture, and a quiet connection to nature into a room without requiring a complete redesign. The right arrangement can soften an empty wall, create a welcoming focal point, or make a home office or counseling space feel more intentional.
The most successful plant-inspired walls are not necessarily the fullest or most expensive. They suit the size of the room, leave enough visual breathing space, and work with the amount of maintenance you can realistically manage. Below, you will find 12 plant wall art ideas ranging from framed botanical prints to real greenery, renter-friendly displays, and simple DIY projects.
Affiliate disclosure: This post contains affiliate links. If you purchase through them, I may earn a small commission at no extra cost to you. As an Amazon Associate, Eveyou earns from qualifying purchases.
Before You Decorate: Choose the Feeling and Function
Start by deciding what the wall needs to do. A blank living-room wall may need one large statement piece, while a counseling office may benefit from a softer composition that supports the room without competing for attention. A small bedroom or rental may need a lightweight, removable solution.
Consider these questions before buying anything:
- How much visual activity feels comfortable? A tightly packed gallery wall looks energetic; three larger prints with generous spacing feel quieter.
- Will you use real or faux plants? Real plants need suitable light, watering access, drainage, and regular care. Faux greenery adds shape without those demands.
- What is the wall made of? Drywall, plaster, brick, and tile require different hanging hardware.
- Who uses the room? In spaces used by children, pets, or clients, avoid unstable shelves, breakable frames, trailing cords, and plants that may be unsafe if touched or eaten.
- How permanent can the installation be? Renters may prefer picture ledges, removable hooks rated for the item’s weight, or peel-and-stick designs approved for the wall finish.
Choose two or three colors already present in the room and repeat them in the artwork, frames, and planters. This creates a coordinated look without making every piece match.
1. Create a Botanical Gallery Wall

A botanical gallery wall is a flexible choice for a living room, hallway, bedroom, or office. Combine leaf studies, vintage botanical illustrations, simple plant photography, and one or two abstract pieces. The variety makes the wall personal, while a consistent palette keeps it cohesive.
For a calm, feminine look, try warm white, dusty rose, muted sage, and soft walnut. Use matching frames for a polished grid, or combine two frame finishes for a collected look. Lay the arrangement on the floor first and keep the spacing consistent—about two to three inches between frames is a useful starting point.
If the room is already visually busy, use three to five medium prints rather than filling the entire wall. A smaller arrangement can still create a clear focal point.
Shopping note: When choosing a botanical wall art set, check the finished dimensions, whether frames are included, and whether the colors shown online will work with your existing paint and furniture.


2. Use One Oversized Botanical Statement Print

One large botanical print can be more effective than many small decorations, especially above a sofa, console, bed, or desk. It gives the eye one clear place to land and is easier to arrange than a gallery wall.
Choose art that fills roughly two-thirds of the furniture width beneath it, then test the scale with painter’s tape before ordering. For a gentle look, consider a watercolor branch, close-up fern photograph, or muted vintage leaf illustration. High-contrast tropical prints create a bolder, more energetic result.
Large frames can be heavy. Use hardware rated for the combined weight of the frame, glazing, and print, and secure it to studs or suitable wall anchors. Acrylic glazing is lighter and may be preferable in child-facing rooms.
3. Keep It Simple With Minimalist Plant Line Art

Plant line art works well in modern bedrooms, compact offices, and rooms where you want nature-inspired detail without adding much color. Black, charcoal, terracotta, or sage lines on a warm neutral background can feel clean without looking stark.
Hang a pair of coordinated prints above a desk or arrange three narrow pieces vertically on a small wall. Thin wood frames soften the look, while black frames make it more graphic. Give each print enough empty space around it so the composition does not feel cramped.
In a counseling office, simple artwork can support a restrained visual plan, but it should be chosen for the room rather than presented as a therapeutic tool. Consider how the scale, contrast, and subject matter fit alongside lighting, seating, privacy, and accessibility.
4. Frame Pressed Leaves or Herbarium-Style Art

Pressed botanical art adds real texture and can become a meaningful DIY project. Use leaves or flowers that are legal and safe to collect, press them thoroughly, and mount them on acid-free paper. Labeling the plant name and date can give the finished piece a classic herbarium feel.
For easier maintenance, use high-quality printed herbarium sheets instead of real specimens. Real pressed plants can fade over time, particularly in direct sunlight. Hang them away from damp areas and use a frame that keeps the material securely enclosed.
A row of three pressed-leaf frames looks lovely above a reading chair or narrow console. It is also an approachable way to use sentimental garden clippings without covering a large wall.
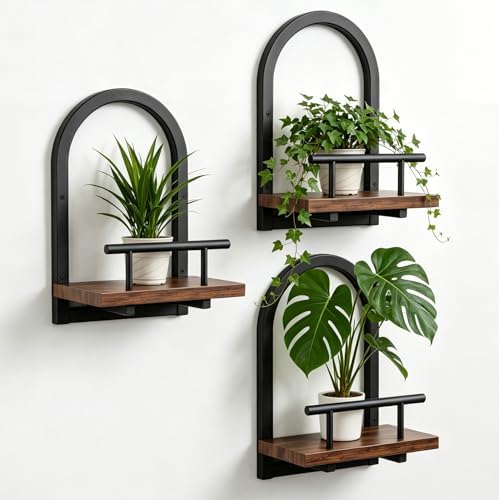
5. Style Floating Shelves With Trailing Greenery

Floating shelves combine wall decor with useful display space. Layer one or two framed botanical prints behind a small planter, then add a trailing plant that can grow along the edge. Pothos, heartleaf philodendron, and similar trailing plants are commonly used indoors, but always verify a plant’s care needs and its safety for the people and animals in your home.
Keep the display manageable. A shelf with one plant, two frames, and a small object often looks more intentional than a crowded row of accessories. Leave room to lift the planter for watering, and use a watertight saucer or cachepot to protect the shelf and wall.
Mount shelves into studs when possible or use anchors rated for the loaded shelf—not just the empty shelf. Do not install heavy planters above beds, cribs, frequently used seating, or areas where a falling object could cause injury.
Shopping note: Compare floating shelves by usable depth, total weight capacity, mounting method, and included hardware. A narrow picture ledge may not safely hold a planter.


6. Layer Botanical Prints on a Picture Ledge

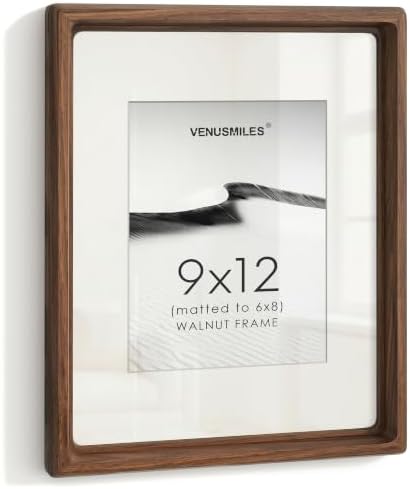
A picture ledge lets you change the display without making new holes for every frame. It is especially useful if you enjoy seasonal updates or are still deciding which arrangement you prefer.
Start with one larger print at the back, overlap a smaller frame in front, and add a lightweight decorative object at one end. Keep the lower part of important artwork visible rather than hiding it behind too many layers. For a soft palette, pair eucalyptus green with blush, cream, and pale oak.
This approach can be renter-friendly if the lease permits a small number of anchored holes. Freestanding ledges or shallow console displays are alternatives when drilling is not allowed. As with shelves, follow the manufacturer’s installation instructions and weight limit.


7. Pair a Wood-Slat Accent With Small Planters
Vertical wood slats create architectural texture and can make a narrow wall appear taller. Add one or two secure wall planters or a small mounted shelf for greenery. The combination works particularly well in an entryway, home office, or modern waiting area.
Keep the palette limited so the wall does not become too dominant. Natural oak with cream planters feels light; walnut with matte black planters feels more dramatic. Before installing slats, locate outlets, vents, pipes, and wall fixtures, and check any building or rental restrictions.
This is a more permanent project than framed art. If you want a similar effect with less commitment, use a wood-toned framed panel or removable slat-look wall covering that is compatible with the surface.
8. Add a Muted Botanical Mural or Wallpaper
A botanical mural can turn a plain wall into the room’s main feature. For a restful, versatile result, look for designs with softened contrast, open background space, and colors repeated elsewhere in the room. Large tropical leaves feel bold, while delicate branches or meadow motifs feel lighter.
Use a mural on one wall rather than every wall in a small room. Order a sample first to check the color and finish in daylight and evening light. Peel-and-stick wallpaper can be useful for rentals, but “removable” does not guarantee damage-free removal on every paint or wall surface. Test a small hidden area and follow the manufacturer’s preparation instructions.
Avoid covering vents, alarms, electrical panels, sprinklers, or required signs. In professional settings, confirm building and fire-safety rules before installation.
9. Mix Woven, Wood, and Botanical Textures

Plant wall decor does not need to consist only of pictures. A small woven hanging, carved wood frame, botanical print, and a modest amount of greenery can create depth while keeping the palette natural.
Choose one material to repeat. For example, use pale wood in the artwork frame and shelf, then introduce texture through a cream wall hanging. Keep the number of shapes controlled: one round woven piece, one rectangular frame, and one trailing plant can be enough.
Textural walls collect dust more easily than flat framed art, so place delicate textiles away from cooking areas and high-humidity rooms. In waiting rooms or child-facing spaces, securely mount every element and avoid loose fringe within easy reach.
10. Try Renter-Friendly Botanical Decals
Botanical wall decals are useful for dorm rooms, rentals, classrooms, and temporary offices. They can create the look of painted branches or scattered leaves without commissioning a mural.
Select a design with separate pieces if you want control over the composition. Begin with the largest element, then add smaller leaves while stepping back regularly to check the balance. Avoid placing every piece at the same height or spacing, which can make an organic design look rigid.
Read the surface requirements carefully. Freshly painted, textured, damp, or damaged walls may not be suitable. Test one decal in a hidden spot, allow it to remain for the recommended period, and remove it slowly according to the instructions.
11. Refresh the Wall With Seasonal Botanical Prints
Seasonal updates do not require a new installation. Keep the frames and change only the prints: budding branches for spring, garden greens for summer, muted leaves for fall, and evergreen sketches for winter.
Store unused prints flat in labeled sleeves so they do not crease. Digital downloads can be affordable, but confirm the file size, printing rights, and intended dimensions before purchasing. Printing every image at home is not always economical; compare ink and paper costs with a local or online print service.
The goal is not to redecorate on a rigid schedule. Change the art when you want a refresh, or keep one year-round arrangement if that is easier.
12. Build a Small Botanical Corner

You do not need a full feature wall to use plant decor. A narrow corner beside a desk, reading chair, or entry bench can hold one vertical print, a small shelf, and a compact plant. Repeating the same green or wood tone in two places makes the corner feel connected to the rest of the room.
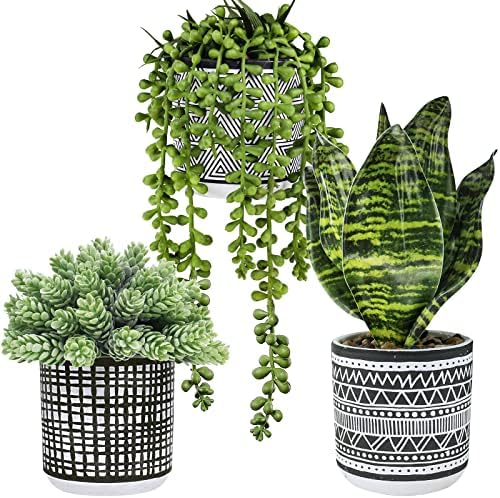
For a small counseling office, place the display where it will not narrow a walkway, obstruct sightlines, or sit directly behind a client at head height. A framed botanical print and one contained plant may be enough. If caring for a live plant is impractical, a convincing faux trailing plant or printed greenery provides the visual motif without watering or light requirements.
Shopping note: For faux plants, look closely at leaf shape, color variation, dimensions, and pot weight. Product photos can make a small plant appear much larger than it is.


How to Arrange Plant Wall Art Without Making the Room Feel Cluttered
A nature theme can still feel busy if every surface is filled. Use these simple rules to edit the arrangement:
- Choose one focal point. Let the gallery wall, mural, or large print lead; surrounding decor should be quieter.
- Repeat a limited palette. Two or three main colors are usually enough.
- Vary scale deliberately. Pair one larger piece with a few smaller elements instead of using many equally sized objects.
- Leave negative space. Empty wall around an arrangement helps define it.
- Check the view from the doorway and seating area. The wall should work from the places people actually see it.
- Remove one item before adding another. This is an easy way to prevent shelves and ledges from becoming storage zones.
If you are designing a counseling setting, see these additional ideas for calming therapy room design and learn how to evaluate therapeutic wall art and client-facing visuals. For a broader nature-based approach, explore practical ways of bringing plants and natural elements into a minimalist therapy office.
Real Plants, Faux Greenery, or Botanical Art?
Each option solves a different practical problem.
- Real plants add living greenery, but they require suitable light, drainage, watering, pest checks, and ongoing care.
- Faux plants work in low-light or hard-to-reach places and require only occasional cleaning, but quality and realism vary.
- Botanical art is the lowest-maintenance option and offers the most control over color, scale, and style.
You can combine them, but you do not need all three. A framed plant print and one healthy potted plant often make a stronger composition than a wall crowded with greenery.
Plant Wall Safety and Maintenance Checklist
Before considering the wall finished, check the practical details:
- Use mounting hardware suitable for the wall material and the item’s full weight.
- Follow shelf, planter, frame, and removable-hook instructions.
- Keep heavy or breakable objects away from beds, seating, and children’s play areas.
- Protect walls and shelves from drainage and condensation.
- Check real plants regularly for pests, damaged leaves, and excess moisture.
- Verify plant toxicity when children or pets may touch or chew leaves.
- Keep exits, vents, alarms, sprinklers, outlets, and accessibility routes clear.
- Confirm landlord, workplace, and building rules before permanent installation.
- Dust faux plants, frames, ledges, and textiles so the display remains fresh.
A Simple Place to Start
Choose the solution that fits your room and your willingness to maintain it. For the easiest update, hang one oversized botanical print or a set of three coordinated pieces. If you enjoy changing decor, use a picture ledge. If you want living greenery, start with one accessible shelf and a plant suited to the available light.
A plant-inspired wall should make the room easier to enjoy—not create another complicated project. Begin with one well-scaled focal point, live with it for a few days, and add only what the space still needs.

About the Author
Hi, I’m Eve, a former school counselor with a master’s degree in School Psychology and a passionate advocate for children and families navigating sensory challenges. As a mom of children with sensory sensitivities, I deeply understand the journey special-needs parents face, and I dedicate myself to researching and sharing practical solutions to help children thrive and feel comfortable in their bodies. My goal is also to empower counselors, therapists, and psychologists with creative strategies and supportive resources to enrich their everyday practice. When I’m not writing or exploring new therapeutic approaches, you’ll find me spending quality time with my family and continually seeking inspiration from everyday moments.

