
A winter sensory corner can give children a predictable place to pause, choose a simple tool, and prepare to rejoin the classroom or session. It does not need artificial snow, an expensive collection of products, or décor that takes over the room. The most useful setup is visible to the supervising adult, easy to clean, and flexible enough for different sensory preferences.
This guide explains how to create a DIY winter sensory corner in a classroom, counseling office, or child-therapy space using practical materials and understated seasonal details. It is a supportive environmental option, not a treatment, reward, punishment, or substitute for an individualized plan.
Affiliate disclosure: This post contains affiliate links. If you purchase through them, I may earn a small commission at no extra cost to you. As an Amazon Associate, Eveyou earns from qualifying purchases.
Begin With the Purpose, Not the Décor
Before buying a pillow or hanging a snowflake, decide what the corner is meant to help a child do. Common purposes include taking a brief break from a busy room, choosing a quieter activity, using a familiar sensory tool, or waiting for adult support.
Write one sentence that defines the space. For example: “This is a place where students may take a short, supervised pause and choose from three approved tools.” A clear purpose makes it easier to select materials and explain expectations.
The corner should never be used to isolate, shame, or force a child to “calm down.” Access should be taught during a neutral moment. Children also need a clear way to leave, ask for help, and return to the next activity.
Safety and Accessibility Checklist

Policies differ across schools, clinics, and licensed settings, so confirm your organization’s requirements before installing anything. Review the finished corner from a child’s height as well as an adult’s.
- Keep the area visible to the supervising adult; do not create a concealed enclosure.
- Leave exits, vents, heaters, outlets, door swings, and accessible routes clear.
- Anchor furniture when required and avoid unstable shelves or heavy objects above seating.
- Keep cords secured and out of walkways. Battery-operated lighting must have a closed battery compartment.
- Choose washable or wipeable materials and create a routine for cleaning shared tools.
- Avoid small loose parts for children who may mouth objects or for mixed-age spaces.
- Do not use scents unless policy allows them and individual allergies, asthma, migraines, and sensory preferences have been considered.
- Treat weighted items as individualized equipment, not universal calm-down tools. Follow organizational policy and relevant professional guidance, and ensure the child can remove an item independently.
- Provide a no-touch option. Some children prefer visual quiet, movement, sound reduction, or space rather than tactile input.
Step 1: Choose a Visible, Low-Traffic Location
Look for a small area outside the main traffic path but still within adult sight. A classroom corner beside a bookshelf may work; a therapy office may use the space beside a chair or low cabinet. Avoid locations next to a heater, exterior door, noisy machine, or direct glare.
Mark the boundary without enclosing the child. A small washable rug, floor mat, or change in wall color can define the area. In a narrow room, a wall-mounted choice board and one movable floor cushion may be enough.
Test the route with mobility devices and make sure the corner does not reduce access to materials or exits. If floor seating is not accessible, provide a supportive chair at an appropriate height.
Step 2: Build a Washable Comfort Base

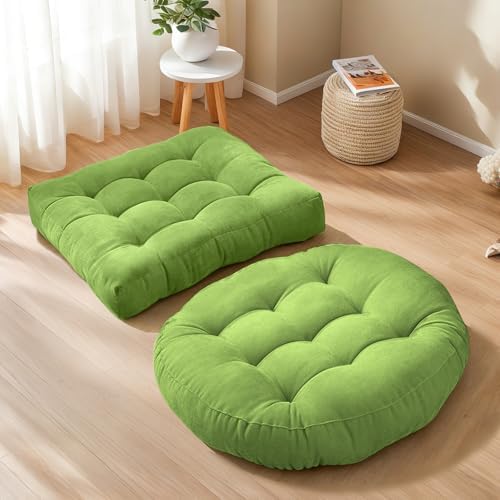
Start with one seating option rather than a pile of textiles. Depending on the setting, this might be a wipeable floor cushion, a supportive chair, a small beanbag with a removable cover, or a foam mat approved for the space.
Add one standard washable throw only if it can be laundered regularly and stored hygienically. Avoid loose faux fur that sheds, long fringe that tangles, and oversized blankets that obscure visibility.
For a winter look, use oatmeal, muted blue, sage, burgundy, or warm gray. The color palette can feel seasonal without turning the area into holiday décor.
Shopping note: For shared spaces, prioritize removable covers, clear cleaning instructions, sturdy seams, an appropriate size, and a stable base over decorative texture.


Step 3: Improve the Lighting Without Adding Hazards

Harsh glare can make a small corner less inviting, but the solution should remain bright enough for safe movement and supervision. Use the room’s approved lighting first. If additional light is allowed, consider a stable cordless lamp or a wall-mounted fixture installed according to policy.
Flameless candles can be decorative in an adult-supervised office, but they should not be treated as a sensory tool or left where batteries are accessible. String lights can create cord, entanglement, and maintenance problems and may be prohibited by school or fire-safety rules.
Place lighting so it does not shine directly into a seated child’s eyes. A simple paper shade over an approved fixture is not automatically safe; never modify a lamp in a way the manufacturer does not permit.
Shopping note: When comparing cordless lamps, check base stability, enclosed battery access, brightness controls, charging-cable management, and whether the surface can be wiped clean.


Step 4: Offer a Small Menu of Sensory Options
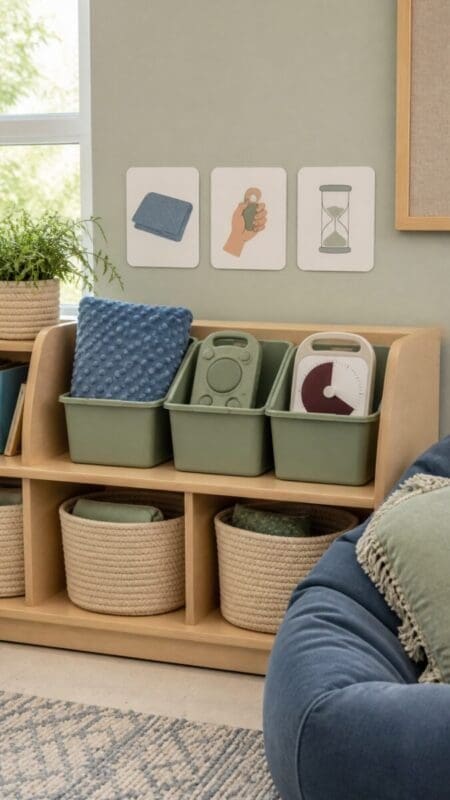
More tools do not create a better corner. Begin with three to five options that differ in what they offer, then observe which are actually used.


Touch and Hand Use
Try a textured fabric square, therapy putty used according to its instructions, a sturdy fidget, or a soft hand-sized object. Avoid toys with leaking gel, weak seams, magnets, or parts that can detach.
Visual Attention
A sealed visual timer, slow-moving liquid timer, simple winter seek-and-find card, or one uncluttered picture can provide a quiet visual choice. Glitter jars should be fully sealed and checked regularly for cracks or leaks.
Sound Management
Offer approved hearing protection or a quiet audio option only when it fits the setting and the child’s needs. Hearing protection should not prevent necessary communication or safety cues. White-noise devices also require thoughtful volume and placement so they do not disturb the rest of the room.
Movement
Some children need movement rather than stillness. A wall-push card, resistance band installed and supervised according to its instructions, or three simple stretch pictures can fit into a small space. Keep movement choices away from shelves, windows, and walkways.
Quiet Communication
Include a blank feelings scale, “I need help” card, paper and pencil, or a simple choice card. A child should be able to indicate that the corner is not helping and request another option.
Shopping note: A useful classroom sensory-tool set should be age-appropriate, durable, washable, free from easily detached parts, and small enough to store separately between uses.
Step 5: Create a Simple Choice Board
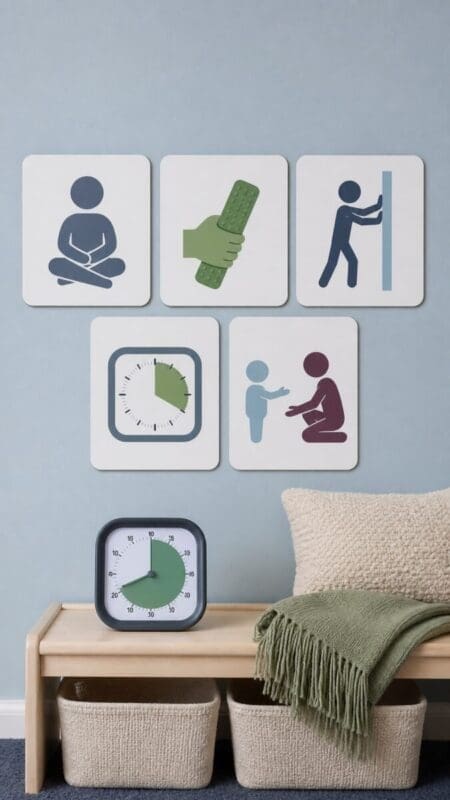
Display three to five options with plain words and clear pictures. For example:
- Sit quietly
- Use one hand tool
- Try wall pushes
- Look at a visual timer
- Ask an adult for help
Teach the menu before anyone is upset. Model how to choose one option, use it safely, return it, and decide what happens next. Keep the language neutral: “Which option would you like to try?” is more respectful than promising that a tool will make a child calm.
A visual timer can make the routine predictable, but it should not turn the space into a countdown punishment. Adults should be able to extend, shorten, or end the break according to the situation and existing support plans.
Step 6: Add Winter Details That Do Not Create Clutter

Choose two or three seasonal elements, not an entire theme installation. Good options include a framed winter landscape, removable paper snowflakes placed out of reach, a muted-blue cushion cover, or a laminated card featuring winter objects to notice.
Avoid loose cotton “snow,” artificial snow powder, breakable ornaments, scented pine products, dangling garlands, and décor that narrows visibility. Natural branches can drop debris or trigger sensitivities and should be used only when they suit the setting.
The corner should still work after every seasonal decoration is removed. If a decoration competes with the purpose of the space, leave it out.
Step 7: Plan Storage, Cleaning, and Resetting

Use a small open bin, labeled drawer, or divided caddy so tools do not become a pile. Separate items that go in the mouth or touch the face, if those items are permitted at all. Follow manufacturer cleaning instructions and organizational infection-control policies.
Create a short adult checklist:
- Inspect seams, batteries, lids, and cords.
- Remove damaged or leaking items immediately.
- Clean shared surfaces and tools on the established schedule.
- Restock paper or disposable materials.
- Notice which options are being used and which create conflict or distraction.
Children can help return appropriate items, but adults remain responsible for safety inspection and sanitation.
Shopping note: Storage works best when each tool has a visible home. Look for wipeable bins with smooth edges, simple labels, and dimensions that fit the shelf instead of buying a large organizer first.


Five Low-Mess Winter Sensory Activities
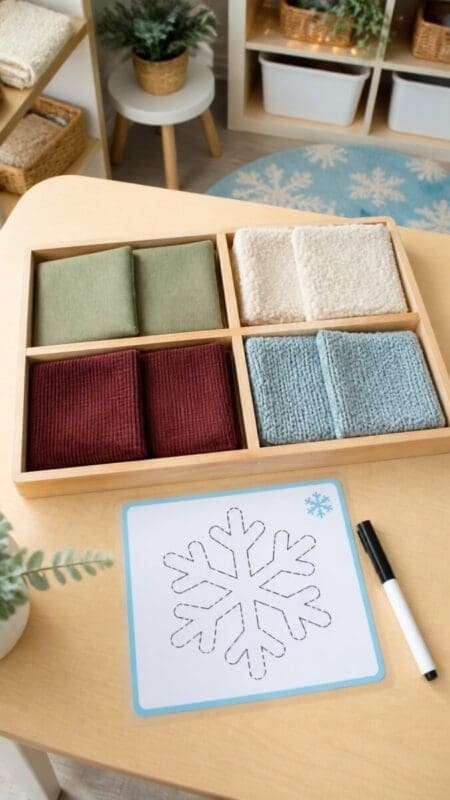
These activities can rotate through the corner or be offered with direct adult supervision. Match them to age, developmental level, policies, allergies, and individual preferences.
1. Winter Texture Match
Place several large fabric squares in a divided tray: smooth cotton, fleece, corduroy, and a knitted swatch. Invite the child to match pairs or describe the textures. Participation is optional, and no fabric should be placed against a child without consent.
2. Snowflake Trace Cards
Laminate a few large, simple snowflake paths. Children can trace them with a finger, dry-erase marker, or small car. Check markers and other tools for age suitability and clean the cards between users.
3. Winter Color Search
Provide a card with four colors and invite the child to find matching objects in the room. This works in snowy and snow-free climates and does not require loose materials.
4. Sealed “Snowfall” Bottle
Use a commercially sealed visual bottle or an adult-made bottle with a permanently secured lid. Inspect it before each use and remove it if the container cracks or leaks. Watching the contents is an optional visual activity—not proof that the mind or body is becoming calm.
5. Warm-or-Cool Choice Cards
Use picture cards showing safe winter choices such as warm socks, cool water, a soft chair, or a short movement break. Ask, “Which would feel more comfortable right now?” This supports communication without assuming every child experiences the same input in the same way.
Classroom and Therapy-Office Adaptations
In a classroom, the corner needs a brief routine that works alongside instruction. Decide who can access it, how the child signals the need, what supervision looks like, and how materials are reset between students. Coordinate with existing accommodations and school procedures rather than creating a separate informal behavior system.
In a therapy office, the corner can be introduced collaboratively and adjusted across sessions. Keep the clinician’s role and scope clear, document relevant observations according to practice requirements, and avoid presenting generic products as individualized treatment.
For a permanent room rather than a seasonal corner, use the broader planning guidance in Sensory Room Design for Counselors. For a lower-cost seasonal transition, see these back-to-school calm-corner ideas.
When a Generic Corner Is Not Enough
A shared sensory corner cannot replace an individualized support plan. Revisit the setup if a child consistently becomes more distressed, avoids the corner, cannot use materials safely, or requires support beyond what the setting can provide.
Seek guidance through the appropriate school, clinical, medical, or occupational-therapy channels when individualized assessment is needed. The goal is not to make every child use the same tools; it is to offer respectful options within a safe environment.
A Winter Corner Should Still Work in Spring
The strongest DIY winter sensory corner is built on clear routines, visibility, choice, and manageable materials. Winter colors and pictures can make it inviting, but the functional structure matters more than the theme.
Start with one seat, three useful options, a simple choice board, and a cleaning plan. Observe how the space is used, remove what does not help, and add new materials only when they solve a real problem. A calm-looking corner is pleasant; a safe and understandable corner is useful.

About the Author
Hi, I’m Eve, a former school counselor with a master’s degree in School Psychology and a passionate advocate for children and families navigating sensory challenges. As a mom of children with sensory sensitivities, I deeply understand the journey special-needs parents face, and I dedicate myself to researching and sharing practical solutions to help children thrive and feel comfortable in their bodies. My goal is also to empower counselors, therapists, and psychologists with creative strategies and supportive resources to enrich their everyday practice. When I’m not writing or exploring new therapeutic approaches, you’ll find me spending quality time with my family and continually seeking inspiration from everyday moments.

